 Planetary attack requires slightly different skills from normal
space combat. The ground being really close is the main complication.
Additionally, planetary attack targets like the Imperial secret base that
was discovered by AIS Intelligence in Giclas 158-27 are usually very well
defended. This means that certain techniques are worth doing to avoid
being blown to smithereens before you can even get close to your objective.
Planetary attack and reconnaisance photography can be done using exactly
the same techniques (except with photography, you typically want to get
a bit closer, and you're not going to blow anything up except the fighters
that will attack you).
The techniques aren't difficult to master. However, before
you attack anywhere that's well defended, you need a good ship. Going in
a Saker is likely to mean suicide. Expect to be attacked by several ships
at once on the way in, and expect to be attacked with NN550 missiles, which
cannot be ECM'd. This means you need enough shields to take some missile
hits. Don't take a huge ship either: you do need quite a bit of
manoeverability when combatting the defenders close to the ground. Something
the size of an Asp, Cobra Mk.3 or a Harris is typically a good ship to
use for these missions. Deck it out with as many shields as you can fit,
and the 4MW laser is handy. Alternately, you can go for more shield generators
and a 1MW beam or a 5MW pulse instead (see the
Combat Equipment section for a full discussion of what to equip with.)
Don't forget that some targets are protected by a Military Defence Satellite -
be sure to take this out before continuing with the mission. Also, don't
forget to set the system to hyperspace out to once the mission is accomplished.
You don't want to waste any time having to select the system whilst you are
being pursued by the target's defending fighters!
|
The base at Giclas 158-27 4c |
The AJN found evidence that the Imperial Seventh Protectorate
was setting up a secret base in the independent system Giclas 158-27 to spy
on Alliance movements. Although this system isn't right on the frontier
of Alliance space (in fact, it's pretty much nestled in with Federation
systems), it's close enough for them to use as a nice, inconspicuous base
for launching various missions into Alliance space which were not necessarily
helpful to the Alliance or the AJN. The AJN was therefore anxious to find
out what was going on there so they could decide what action to take. The
Alliance in fact did end up blowing the base up - the photographs revealed
a stockpile of nuclear weapons, so a pre-emptive strike was initiated.
The Empire of course squealed like a stuck pig, but couldn't really do a
great deal about it. The Federation were also rather pleased, but somewhat
embarrassed that they hadn't found it themselves when it was so close to
the Core Systems. (The Federation also had
their turn to do some squealing when the AJN Intelligence Division smashed
the spying ring they were trying to set up within the Alliance). Even so,
neither the Empire nor the Feds have learned their lesson; the AJN
continuously have to be on guard, and the AJN Intelligence Branch get plenty
of opportunities to blow up installations like this one.

|
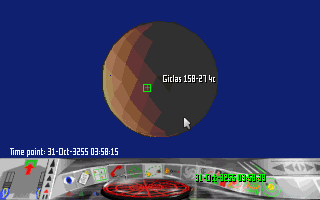
First, the planetary map screen. Go to the orbital chart and zoom in on
the planet where the suspect structure is. Rotate the image of the planet,
and you'll usually find an unmarked structure. Select this - it should
appear as a small cross.
|

|
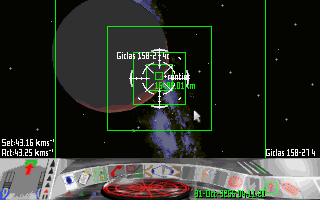
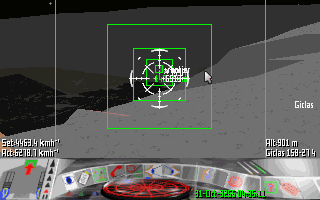
Then fly to the target. The autopilot should get you most of the way. Once
you're close, it's best to be on manual, I find. Aim slightly before the
target, so you can get a low-level run. This helps you evade detection.
You will probably get attacked a couple of times, but if you go straight
in, you will be attacked a lot more! If you have labels on (recommended),
the target structure should be labeled +rontier most of the time. Quite
why, I don't know...
|

|
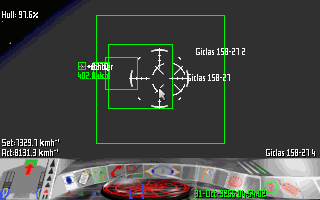
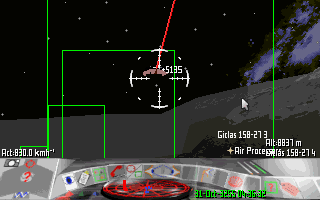
As you get closer, be sure to reduce your speed to something sensible.
Approaching the ground closely at tens of thousands of km/h (or worse,
km/s!) is a recipe for CFIT (Controlled Flight into Terrain). This will
of course make your day rather miserable. Aim for about 200 km short of
the target. Keep below 10,000 km/h at this stage.
|

|
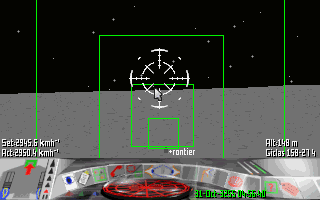
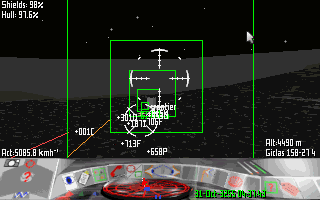
Try to skim the ground as closely as possible - typically below 400m works
well. You won't get attacked for most of the way in. The defenders typically
aren't that competent and will collide with terrain in a desperate attempt
to stop you. However, be prepared: when you get close to the target, you
will get attacked by quite a large number of defenders. This particular
base was at the bottom of an incredibly deep canyon - here we are skimming
along the plateau that leads to the canyon.
|

|
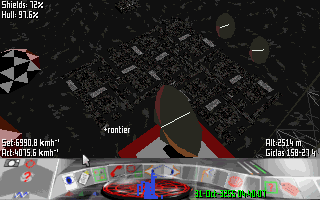
Hurtling over the precipice into the canyon, this is where the danger
level picks up by an order of magnitude. Now the defenders can clearly
see you approaching on their scanners. Prepare to be attacked.
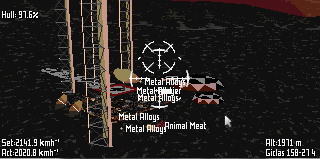
If you look carefully at the target, you'll see a jumbled mess of labels.
This indicates that numerous fighters have already been launched,
and are heading for an intercept.
This canyon
is approximately 10km deep. As you teeter over the edge of the canyon,
try and follow the terrain as closely as possible. This will make it
harder for the defenders to attack you - they can't get behind you very
easily. Also, start slowing down. It is best to be going less than 1000 km/h
when in combat close to the ground. This will allow you more time to rectify
problems such as ensuring you don't slam into the terrain. If you go too
fast, you could find yourself hurtling towards the ground without
sufficient thruster power to prevent the impact.
|

|
Combat close to the ground is very exciting. Don't forget that your
engines will automatically be in the "Off" (ie manual thruster control)
position when you are attacked. That means that the computer will not
be automatically compensating for gravity, so remember to watch your
altitude, and thrust yourself away from the ground. You now also have
new techinques to bring to bear against multiple attackers: if you're
good, you can dive towards the ground, time it right...and many of your
attackers will probably drive straight into the ground. However, be
on your guard for this happening to you! The ground will smite you
far quicker than any 4MW beam laser will.
|

|
At this point, we are very close to our target, which for this mission is
going to be photographed. Defending fighters now abound - there are seven
visible at this time. I find the best strategy at this point is speed up for
the final run. If I get the opportunity, I try and pick off some of the
defending fighters. Typically, if you've timed your acceleration run in
correctly, they will have a hard time staying with you because you'll
rocket on by whilst they have to turn around to catch you up. However, by
that time your objective will be complete, and you'll be climbing out
so that you can hyperspace away.
|

|
We got right within the base on this one, and took some excellent recon
photographs, showing the AJN Intelligence Division exactly what the
Empire were plotting. This is a good point at which to climb out as quickly
as possible, and hyperspace away. Mission accomplished!
|
The technique shown above has served me well. Although you do
want to use this as an opportunity to improve your Elite rating, the low
level run in prevents the defending fighters from overwhelming you. Never
ever forget about the proximity of the ground when you are trying to fend
off the defence fighters as you get close in! Many of these missions fail
not because the recon/bombing flight was shot down - quite often the terrain
itself claims the flight. It's a good idea to practise high speed, low level
flight before you take the mission on. Find any suitable moon and practise
low level flight without the stress of being attacked by multiple fighters!
|

 Planetary attack requires slightly different skills from normal
space combat. The ground being really close is the main complication.
Additionally, planetary attack targets like the Imperial secret base that
was discovered by AIS Intelligence in Giclas 158-27 are usually very well
defended. This means that certain techniques are worth doing to avoid
being blown to smithereens before you can even get close to your objective.
Planetary attack and reconnaisance photography can be done using exactly
the same techniques (except with photography, you typically want to get
a bit closer, and you're not going to blow anything up except the fighters
that will attack you).
